วิธีติดตั้ง ZABBIX 3.4 ใน CentOS 7
สิ่งที่ต้องติดตั้ง
- Install Apache2/httpd on CentOS 7
- Install and Configure PHP 7.2 on CentOS 7
- Install and Configure MySQL
- Install and Configure Zabbix 3.4 on CentOS 7
- Configure FirewallD
- Zabbix Initial-Setup
- Change Default Admin
1.ทำการติดตั้ง apache/httpd
#yum -y install httpd
2.ทำการใช้คำสั่งนี้เพื่อ auto enable start service หลังทุกๆครั้งที่ reboot
#systemctl start httpd
#systemctl enable httpd
3.ทำการติดตั้ง webtatic และ EPEL repository
# yum -y install epel-release
# rpm -Uvh https://mirror.webtatic.com/yum/el7/webtatic-release.rpm
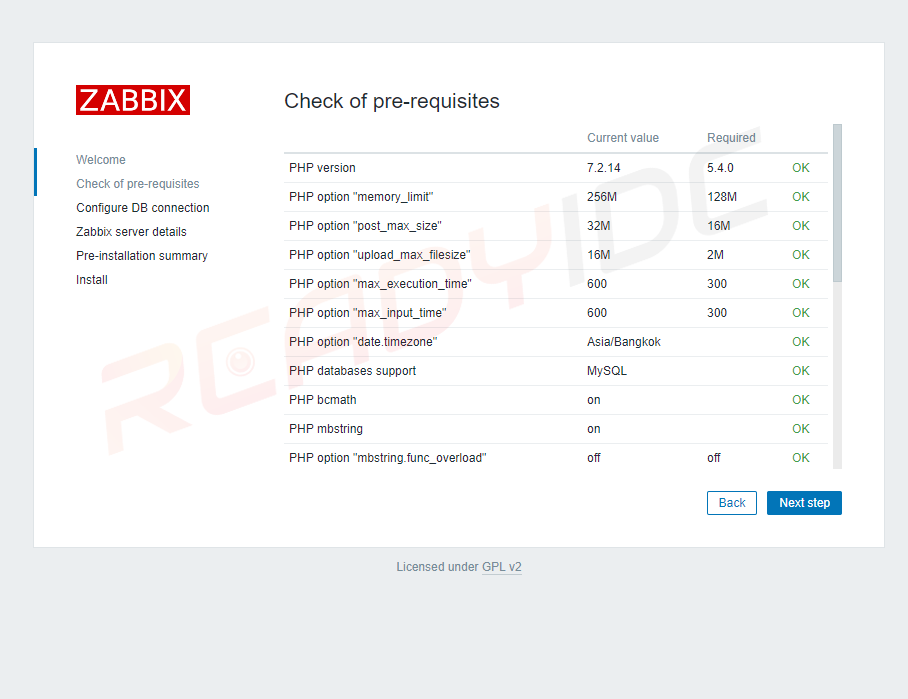
4.ทำการติดตั้ง PHP7.2 + Extensions
# yum -y install mod_php72w php72w-cli php72w-common php72w-devel php72w-pear php72w-gd php72w-mbstring php72w-mysql php72w-xml php72w-bcmath
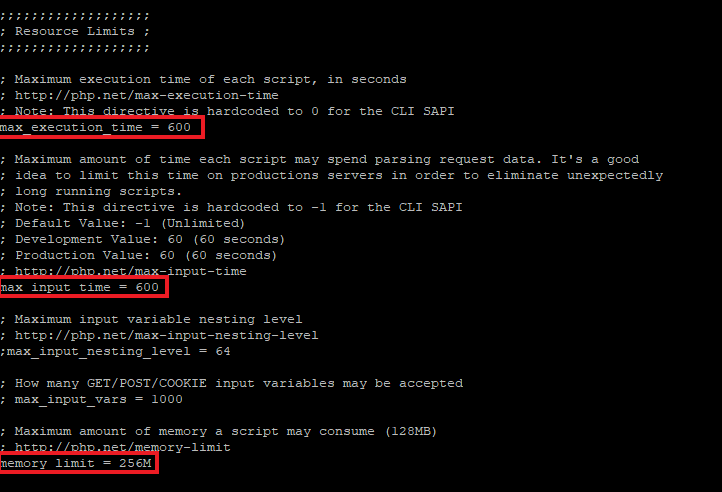
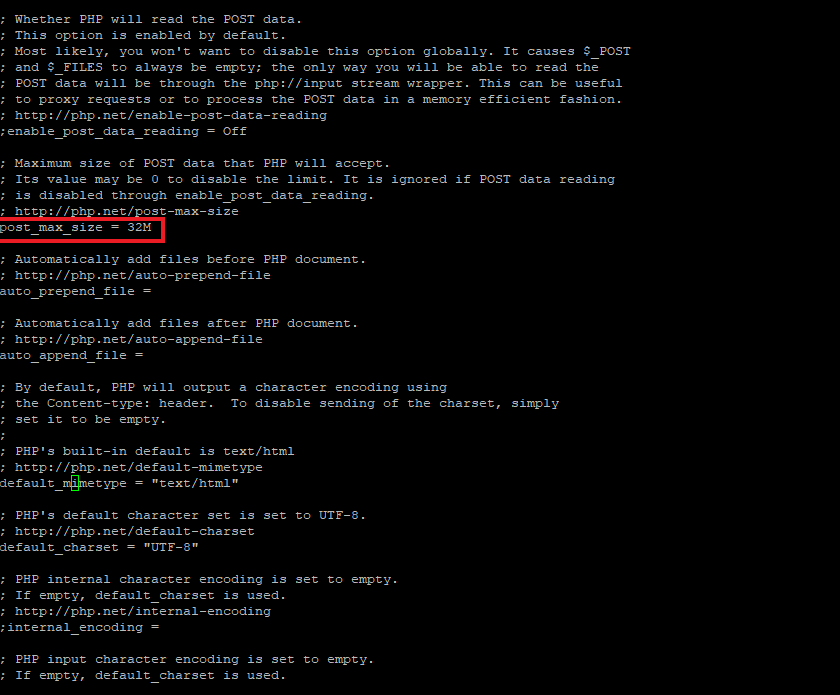
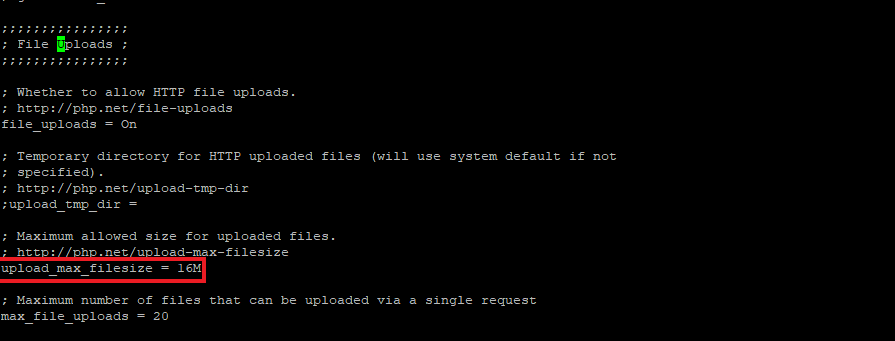
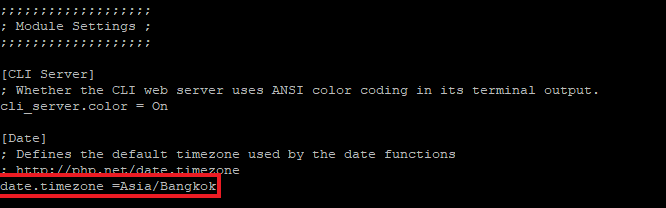
5.ทำการแก้ไข “php.ini” ไฟล์
#nano /etc/php.ini
เปลี่ยน value ค่าต่างๆดังนี้
max_execution_time = 600
max_input_time = 600
memory_limit = 256M
post_max_size = 32M
upload_max_filesize = 16M
date.timezone = Asia/Bangkok
6.Restart httpd service
#systemctl restart httpd
7.ทำการติดตั้ง mariadb-server
# yum -y install mariadb-server
8.หลังจากติดตั้งเสร็จแล้วให้ทำการ start และ enable mariadb service
#systemctl start mariadb
#systemctl enable mariadb
9.ทำการ config mariaDB password
#mysql_secure_installation
10.หลังจาก configเสร็จ ให้ทำการ login MySQL shell
#mysql -u root -p
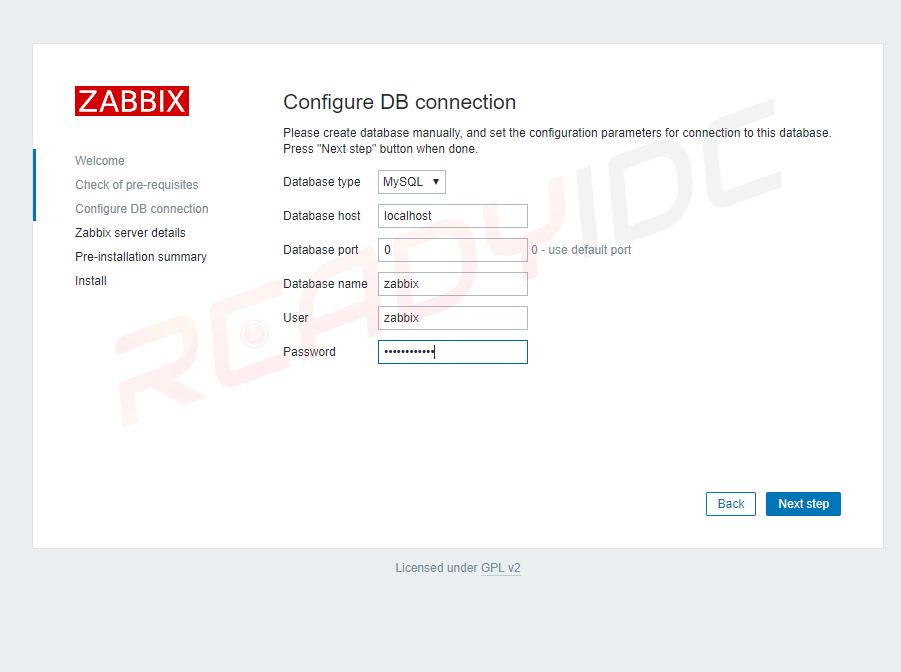
และทำการ เขียน queries ใน shell
–>create database zabbix;
–>grant all privileges on zabbix.* to zabbix@’localhost’ identified by ‘Readyidc123′;
–>grant all privileges on zabbix.* to zabbix@’%’ identified by ‘Readyidc123’;
–>flush privileges;
–>\q
11.ทำการติดตั้ง Zabbix repository เข้า CentOS 7
# yum -y install http://repo.zabbix.com/zabbix/3.4/rhel/7/x86_64/zabbix-release-3.4-1.el7.centos.noarch.rpm
12.ติดตั้ง Zabbix packages
# yum -y install zabbix-get zabbix-server-mysql zabbix-web-mysql zabbix-agent
13.Import zabbix database sample เข้า zabbix databaseของเรา
#cd /usr/share/doc/zabbix-server-mysql-3.4.6/
#gunzip create.sql.gz
#mysql -u root -p zabbix < create.sql
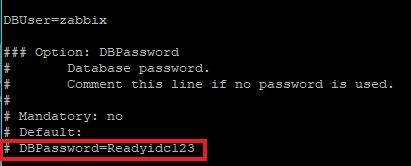
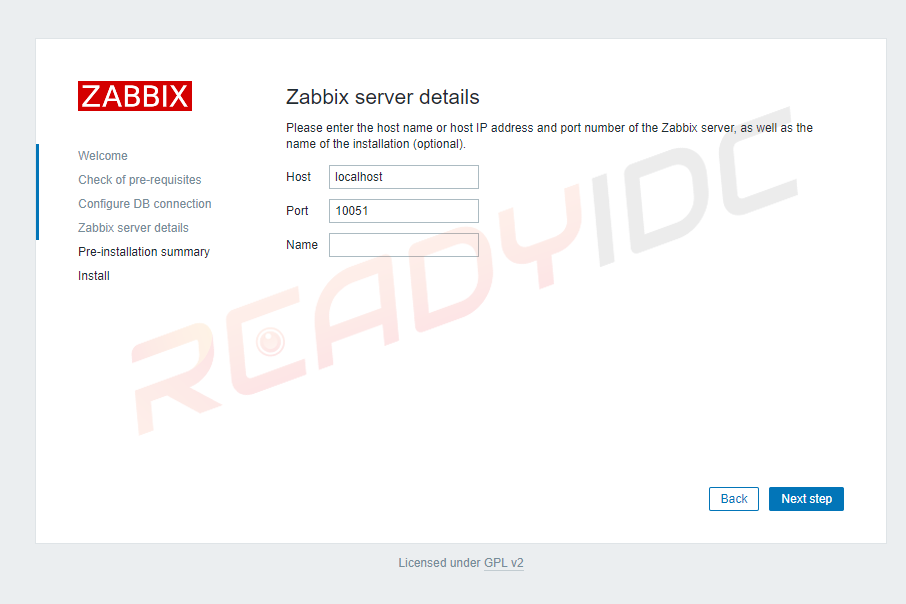
14.ทำการ config zabbix server
# nano /etc/zabbix/zabbix_server.conf
ให้เปลี่ยน DBPassword ให้เป็น password ใน database ของเรา
DBPassword=Readyidc123
15. enable และ start Zabbix service
#systemctl start zabbix-server
#systemctl enable zabbix-server
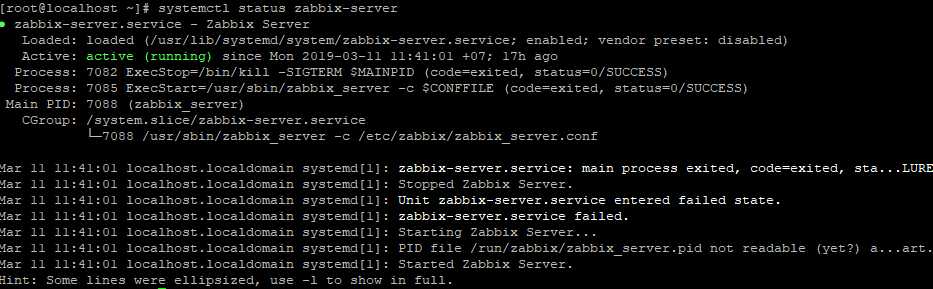
16.เช็ค status Zabbix server run ไหม
#systemctl status zabbix-server
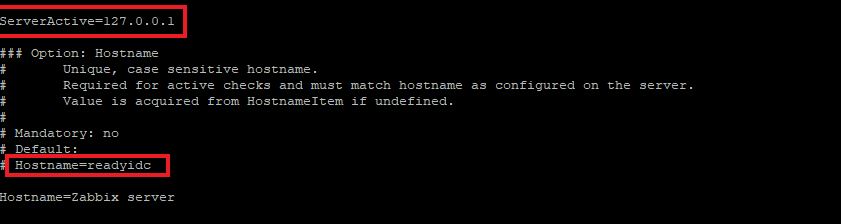
17.ทำการ config zabbix agent
# nano /etc/zabbix/zabbix_agentd.conf
เปลี่ยน Line เป็นของเราดังนี้
Server=127.0.0.1
ServerActive=127.0.0.1
Hostname=readyidc
18.start enable zabbix agent
#systemctl start zabbix-agent
#systemctl enable zabbix-agent
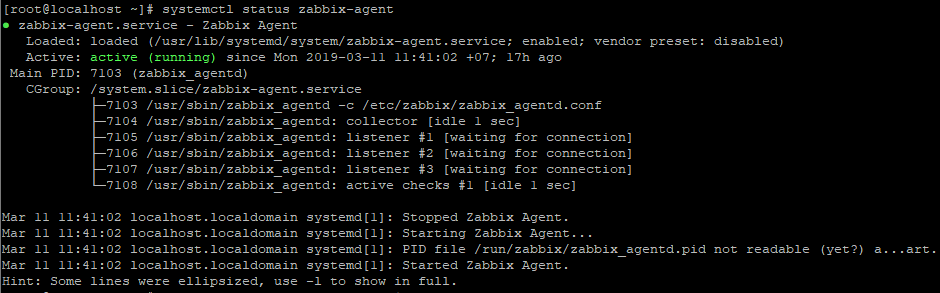
19.เช็ค status zabbix-agent run ไหม
# systemctl status zabbix-agent
20.config firewalld
#firewall-cmd –add-service={http,https} –permanent
#firewall-cmd –add-port={10051/tcp,10050/tcp} –permanent
#firewall-cmd –reload
#firewall-cmd –list-all
21.ทำการ restart service ต่างๆ
#systemctl restart zabbix-server
#systemctl restart zabbix-agent
#systemctl restart httpd
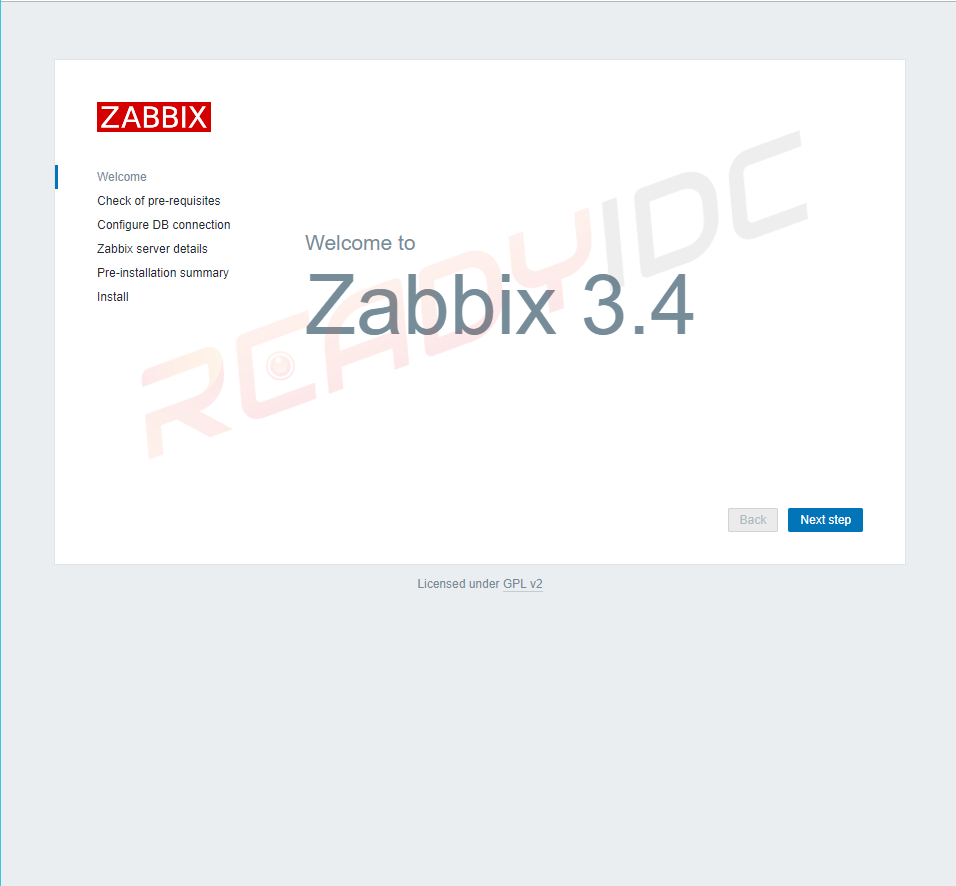
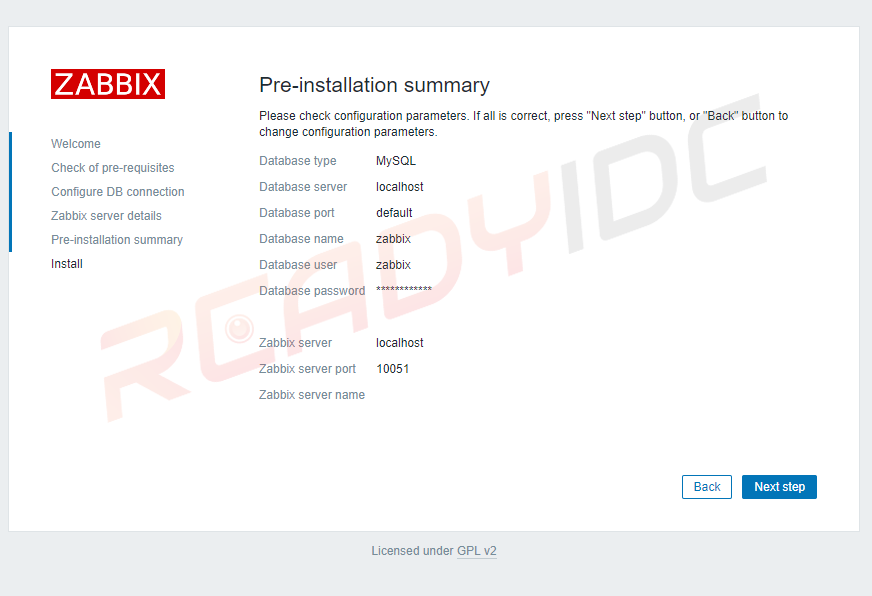
เปิด web browser แล้วพิมพ์
http://your_ipaddress/zabbix/
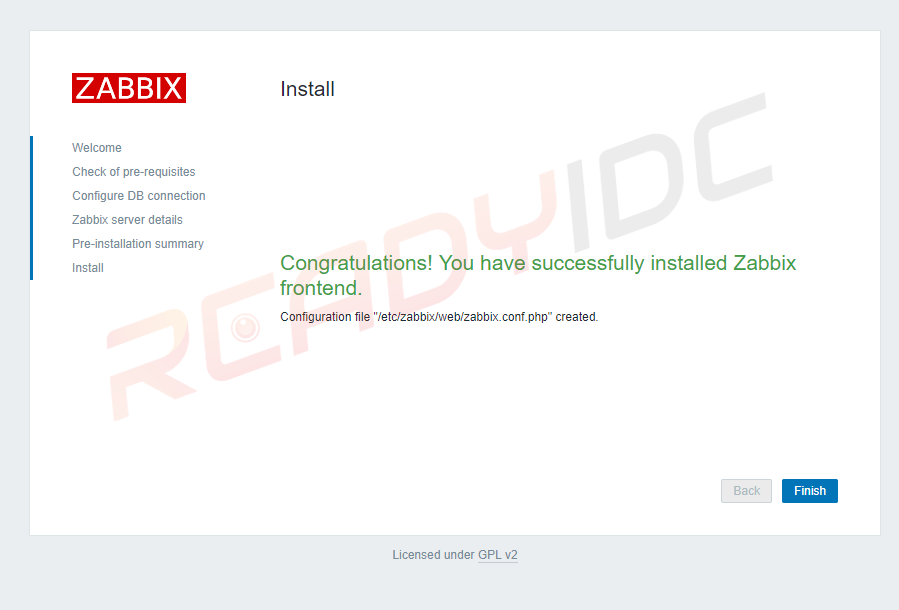
ทำการตั้งค่าต่างๆ
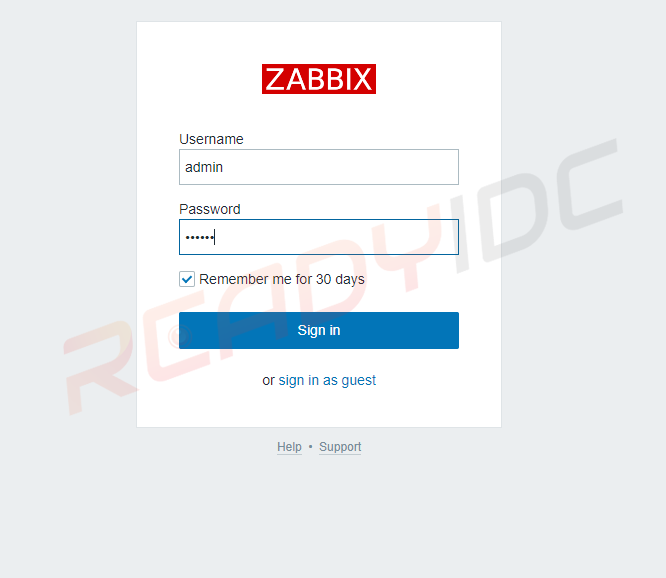
Default username และ password จะเป็น
username = admin
password=zabbix
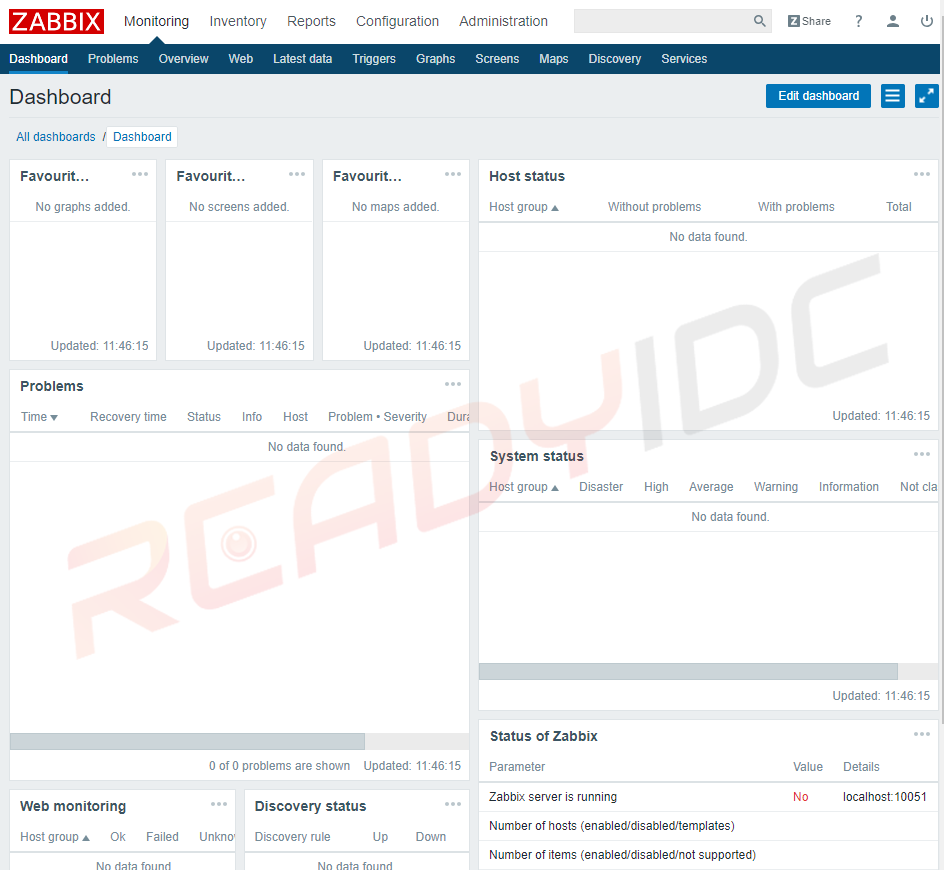
เท่านี้ก็เป็นอันเสร็จสิ้นติดตั้ง Zabbix